Weigela Florida Watercolor
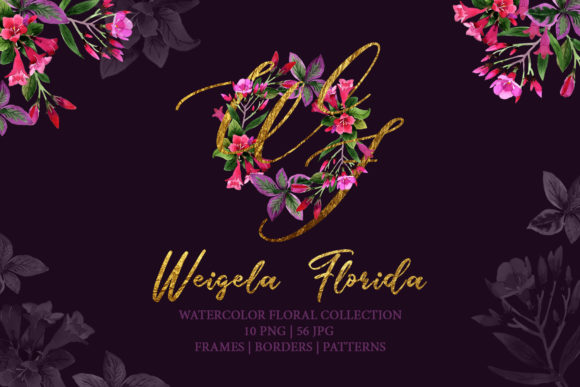
You have found a set of hand-painted aquarelle illustrations featuring delicate Weigela florida blooms. The 66‑file collection includes PNG clip‑art with transparent backgrounds, JPG patterns and frames at 3500×3500 pixels, and isolated elements ready for DIY, wedding invitations, greeting cards, quotes, blogs, posters, and more. Before you download or start using these files, a few practical points will help you get the best results without frustration.
Common Misunderstandings About File Formats and Transparency
The pack provides 10 PNG files and 56 JPG files, but each serves a different purpose. Many users assume every image is a transparent PNG, only to struggle later when a JPG pattern does not sit seamlessly over a colored background. The PNG files – isolated flowers, leaves, and small accents – have no background, so you can layer them directly into your design. The JPG files are the frames, borders, and patterns, and they come on a solid white (or light) background. Trying to overlap a JPG border onto a dark invitation will leave a white rectangle unless you remove the background manually.
What you can do differently: Before you start a project, open each file and note which are PNG and which are JPG. For JPG frames, use them as standalone design blocks, or extract the watercolor pattern by using layer blend modes like Multiply in your editing software. This small step saves you from reworking layouts later.
Overlooking Resolution and Print Readiness
All graphics are 300 dpi, which is excellent for print. The JPG patterns and frames are 3500×3500 pixels – roughly 11.6 inches at 300 dpi, giving you a generous canvas. Yet beginners sometimes resize these files smaller than 300 dpi when scaling down, or they enlarge a tiny PNG element without checking its pixel dimensions. The PNG clip‑art pieces may vary in size; if you stretch a small isolated flower beyond its original dimensions, it becomes pixelated and loses the smooth watercolor look.
Better approach: Open each element in your software and check its width and height. Use the PNG files at their native size or scale them down. If you must enlarge, do so by no more than 20–30% and apply a slight sharpening afterward. For large backgrounds or frames, stick to the JPG pieces at full resolution – they already cover a standard page.
Misjudging Color Flexibility and Editability
The description says “full editable size, colors, etc.”, which can be misinterpreted. These are raster images, not vectors. You cannot recolor a watercolor petal with a single click like you can with an SVG or AI file. However, you can adjust hue, saturation, brightness, and contrast using Photoshop, GIMP, or Canva. The “editable” promise refers to the fact that the elements are separate, high‑resolution files you can transform, crop, and composite freely.
Advice for color matching: If your wedding palette is dusty rose and sage, but the Weigela blooms are pink and green, you can use adjustment layers or filters to shift the hues. Desaturate slightly and add a tint. Test the adjustment on a duplicate layer first so the original stays intact. JPG patterns that contain multiple colors are harder to recolor without affecting the whole design; for those, consider using them as is or overlaying a semi‑transparent color wash.
Ignoring the Variety Inside the Pack
With 66 files, it is easy to grab the first pretty flower and call it done. But the pack includes frames, borders, patterns, and isolated elements – each with a distinct usefulness. A common mistake is using a pattern JPG as a background for text without looking at the border frames that could frame the text more elegantly. Or printing a border on thick cardstock without remembering it already has a white fill that might show on colored paper.
Practical tip: Before you start any project, organize the files into folders: Frames, Borders, Patterns, and Isolated. Quickly browse all of them. For a greeting card, combine a frame JPG (use Multiply blend to remove the white) with an isolated PNG flower on top. For a blog header, use a pattern JPG as a background and place a transparent PNG bloom in the corner. The real value of this set comes from layering different elements together.
Relying on Low-Resolution Previews for Final Use
When you download clipart from online marketplaces, the preview images are often small and compressed. Some creators end up using the preview thumbnails in a rush, not realizing they are 72 dpi and will print blurry. The actual 300 dpi files look crisp and retain the hand‑painted watercolor texture. Always download the full pack and check the actual file dimensions before designing.
Confidence check: Right‑click the file properties on your computer. The JPGs should be 3500×3500 pixels at 300 dpi; the PNGs may vary but will also be 300 dpi. If you are working on a digital project for screen use only, 300 dpi is still fine but you can safely scale down without loss. For print, keep everything at 300 dpi.
Underestimating the Value of Hand‑Painted Imperfections
Watercolor elements have natural variations in color, opacity, and edge softness. Some users try to “fix” what they see as unevenness – adjusting levels to make the colors perfectly flat or removing the subtle paper texture. Doing this strips away the charm. The aquarelle style is prized for its organic feel; harsh corrections make it look like a cheap imitation.
The right mindset: Embrace the bleeding edges and light washes. When pairing with text, place the bloom on a subtle shadow or a soft gradient to enhance depth, not to mask the watercolor effect. The “imperfections” are what give your DIY invitations or posters a hand‑crafted, elegant look that standard vector clipart cannot replicate.
Forgetting to Check Usage Rights Before Commercial Use
Even though the pack says “Ready to print or use for anything you want”, that statement often refers to personal and small‑scale commercial projects. Many digital clipart sets have restrictions: you cannot resell the raw files, claim them as your own, or use them on print‑on‑demand sites without an extended license. Each marketplace has its own terms, even if the product description seems open.
What to verify: Look at the license file included with the download or read the product page carefully. For wedding invitation businesses or Etsy sellers, confirm that you can incorporate the elements into physical products for sale. When in doubt, contact the seller with a simple question – it takes five minutes and avoids legal headaches later.
Not Planning File Organization from the Start
With 66 files, it is tempting to dump them all into one Downloads folder and search for “flower” each time. This leads to wasted time and accidental use of the wrong file (e.g., a pattern in place of a border). The pack already contains separate file names, but renaming them based on your workflow can save even more time.
Simple system: Create subfolders: PNG_isolated, PNG_botanical, JPG_patterns, JPG_frames, JPG_borders. Add a short text note describing which elements pair well together. When you start a new project, copy the files you need into a project folder, keeping the originals untouched. This habit keeps your creative process fluid and prevents accidental overwrites.
Mistaking File Count for Versatility
10 PNGs and 56 JPGs may sound like a lot, but the real versatility lies in how you combine them. A mistake is to use only one or two elements repeatedly, or to use a pattern exactly as it is without cropping or rotating. The watercolor texture makes it easy to rotate, flip, or tile a pattern to create different looks. For example, take one pattern JPG, rotate it 45 degrees, place an isolated PNG bloom at the center, and you have an instant new background for a quote card.
Better practice: Spend 30 minutes experimenting with layering combinations in your design software. Use a border as a frame for a PNG flower group. Use a pattern as a background for a text overlay, then adjust opacity. The more variations you test, the more unique your output becomes, and the more value you get from the pack.
Focusing Only on Digital and Forgetting Physical Print Quality
Many creators design solely on screen and forget that watercolor elements can lose subtlety when printed on matte or uncoated paper. The light washes might disappear, and the fine details could blur if the printer is not calibrated. A common disappointment happens when a beautiful pink gradient on screen comes out muddy on paper.
Pre‑print steps: Request a sample print from your home printer on the actual paper you plan to use (cardstock, linen, etc.). Check that the PNG transparent elements lay properly over colored backgrounds without white halos – this usually indicates that you need to adjust the blend mode or refine the edge selection. If you are sending to a professional printer, ask for a proof before the full run. These small checks ensure the hand‑painted quality survives the transfer to physical media.
Not Considering the Learning Curve for Blend Modes and Layering
Not everyone who buys a watercolor clipart set is a design expert. Beginners often place a JPG frame over a colored card and see a white box, then assume the file is broken. They might not know about Multiply, Screen, or Overlay blend modes. The same misunderstanding happens with PNGs – they have no background, but placing them on a white canvas defeats the purpose.
Helpful advice: If you are new to layering, open your design software and look for the blend mode option (usually in the layers panel). Set the JPG frame to Multiply – this removes the white background and lets the paper color show through. For PNG elements, keep them on normal mode. Test with a dark background to see the true transparency. Simple tutorials on YouTube for “blend modes in Canva/Photoshop” will unlock the full potential of this set.
Summary of What to Check Before You Start
- File types: Know which images are PNG (transparent) and which are JPG (solid background).
- Resolution: Confirm 300 dpi for print; note pixel dimensions of individual PNGs to avoid scaling issues.
- Color editability: Understand that raster watercolor images need hue/saturation adjustments rather than vector recoloring.
- Element variety: Browse all 66 files to find frames, borders, and patterns beyond the isolated flowers.
- Usage license: Commercial terms vary – read the included license or contact the seller.
- Organization: Set up folders and naming before you start designing.
- Software skills: Learn basic blend modes and layering to make the most of JPG frames and PNG overlays.
- Print testing: Always test on your final paper and ask for a proof from a professional printer.
The Weigela Florida Watercolor set is a rich resource for creatives at any level. By avoiding these common pitfalls, you will produce work that looks cohesive, professional, and truly hand‑crafted. Whether you are making invitations, social media graphics, or home décor prints, the watercolor charm of these aquarelle elements can elevate your project with a soft, botanical touch. Take the time to understand the materials, and you will find that the possibilities really are endless.